Account Settings
This is the location where most of Pinch's functionality is customised. Account configuration basics to get you set up for success. Set the rules for how payments flow, how communication is handled, and how much flexibility your customers get.
The settings you choose here apply globally across your entire account, they’ll affect:
-
Any new contacts imported or created in your accounting software
-
Existing customers who aren’t yet on a Pre-Approval
You can always override many of these rules at the customer level if needed.
Organisation Details
In the Organisation Details section, you can:
-
Review your company information
-
Update your local timezone
-
Add or change the email address that Pinch uses for system notifications
Important: For security reasons, your Trading/Legal Name, ABN, or Address can’t be edited directly. If any of these need to change, raise a support ticket and our team will update them for you.

Getting Paid
This is where you decide:
Payment types
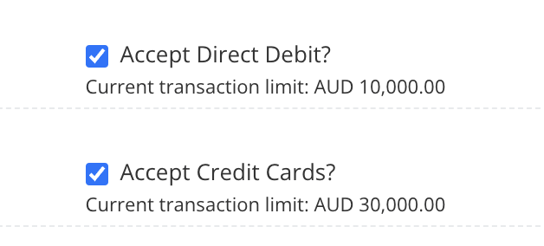
Choose whether you’ll accept card payments, bank transfers (Direct Debit), or both.
Note: You can also see your account's transaction limits for each (These are the default values). Disabling any of these options will remove them in both the Pay Now , and Pre-Approval Signup screens. You can change this on a per-client basis as well if you need to.
Surcharging
Decide if you’ll pass card or bank processing fees onto your customers, absorb them yourself, or mix and match depending on method.
Note: If surcharging is enabled, all payments of the chosen type will incur the processing fee to be passed onto your customers regardless of invoice size or type (Plans or Adhoc invoices) The way this is recorded and managed in your accounting system is explained in further detail here. 
Batch payments
Enable or disable batch settlement. With batching on, your customers and you can bundle up multiple invoices into one lump sum and pay this all at once.
Note: This feature isn't compatible with Invoice Breakdown Plans yet, so it may need to be turned off if you wish to make payment plans generically available for clients to opt-in to. 
Reattempt Settings
Not every payment succeeds the first time, maybe the customer’s card expired, or their bank account didn’t have enough funds. Pinch can automatically reattempt failed payments so you don’t have to chase them.
Here you will set:
- Days between reattempts
e.g. retry every 3 days. - Maximum reattempts
How many times Pinch should try before giving up.
Once the limit is reached, you’ll be notified so you can decide on next steps with the customer.

Pre-Approval Settings
Pre-approvals are at the heart of cash flow certainty in Pinch. Here, you can:
- Locate a new customer sign up link
- Configure opt-in custom text
- Add a Terms and Conditions link to your pre-approvals
- Globally apply auto-debit limits (e.g. no single transaction above $5,000).
This allows you to set an account-wide Auto-debit threshold, where invoices below this value will be Auto-debited, but invoices above this will not (Requiring manual payment attempts via a Merchant initiated action)
These defaults can always be customised per customer, but setting strong account-wide rules makes sure your whole system runs smoothly.

Logo
This is the location where you can upload or change the logo you wish to appear across all Payer-facing emails and web pages. This includes Pay Now, Pre-approval, Email Notifications, and Customer Portal merchant references.
Note: We recommend either PNG or JPEG formats and a minimum sizing of 250x250px. 
Emails
Here, you can edit several of Pinch's automated emails to your clients. Emails contain both the Main Message (Required content that cannot be edited) and an Additional Message (which can have custom text applied).
You can also see the trigger for each email. More information about this can be found here. 
Xero/QuickBooks/MYOB Config Settings:
-> Navigate to 'Xero Config' or 'Integration Config' in the left-hand menu.
Here is where you can customise Pinch's behaviour depending on each accounting system integration and its available feature set, as well as match or change which Bank Account Pinch sends reconciliation data to (We always recommend matching this to the account we deposit to)
Note: Currently, only Xero supports customisation by Branding Theme (Invoice Template)
Xero:
Xero users can enable or disable certain features of Pinch on any of their branding themes. These Features are as follows.
Accept Payments from Pinch = Enable Pinch as your Default Pay Online provider.
Allow Customer opt-in for Auto-debit = Checkbox for Pre-approval self-enroll from Pay Now
Monitor for Auto-debit = Enable or disable Automatic Debits for invoices on this template
Send Invoice Notification = Allow Pinch to send an email whenever we detect a new invoice 
QuickBooks /MYOB/:
There are three settings can be configured, which are the "Send Invoice Notifications", Bank Account for reconciliation and lastly, the default Income Account and Category codes for payments created in Pinch (Payment plans)
Page One
Page Two 
Common Questions
Q: If I turn on surcharging here, can I make exceptions for certain customers?
Yes, account-level rules apply globally, but you can override them at the customer level in the Customers tab.
Q: What happens if a payment keeps failing after the maximum reattempts?
Pinch stops trying and flags the payment for you. At that point, you’ll need to follow up directly with your customer or adjust their payment method.
Q: Can I use my own email server to send Pinch’s automated emails?
No, emails are always sent through Pinch’s system. However, you can fully customise the templates so they look and feel like they’re coming from you.